Thursday, December 24, 2009

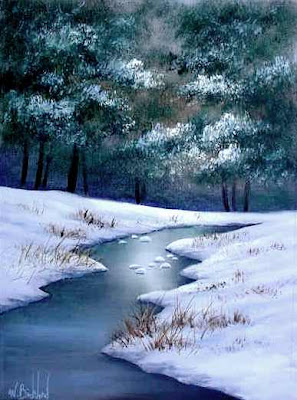
"WINTER STREAM" Project Lesson


I thought I'd share some insights as to my thought processes and techniques with this painting.
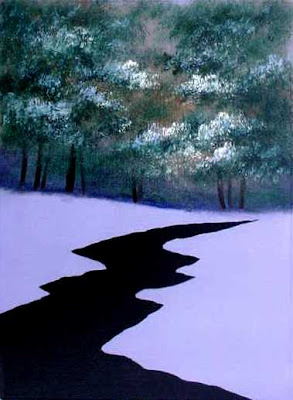
This was created this afternoon and I took step-by-step photos along the way to highlight certain points. Although this is considered an Oil painting, I did start with some Acrylic gessoes for the underpainting; a blue-gray for the snow and black for the stream. The idea is to let the underpainting show through to influence the top layer of Oil colors.
Photo #1 - The blue and black Acrylics were applied using a disposable foam brush ( hardware-store variety ) When that was completely dry, I scrubbed a thin coat of LIQUIN over the entire canvas to ease the application of the Oils and to facilitate blending. ( any clear Oil medium would suffice )
Photo #2 - Using a Fan brush, I used small amounts of Van Dyke Brown, Burnt Sienna, Sap Green and Ultramarine Blue to scrub in a "mottled" suggestion of deep woods. I purposely kept the bottom area darker to help convey the feeling of deeper shadows in the undergrowth. Notice that I did not cover up all of the Acrylic undertone and it is peeking through here and there. ( the Oils were applied very thinly and scrubbed in )
Photo #3 - Tree trunks were added using Van Dyke Brown on a 3/8" Flat brush. Evergreen branches were rendered with a Fan brush and varying mixtures of Sap Green, Ultramarine Blues and Van Dyke Brown. Snow on the branches was indicated with Blue and White on the Fan brush, ultimately building to pure Titanium White for the lightest highlights which were placed more centrally on the canvas.
Photo #4 - Using my background Blues, Greens and Browns, I painted the reflection colors into the water. This was with the Flat brush. Note that the brightest glow in the water is nearer the center as it will be an important part of the focal point, or "center of interest". I used T. White for this area. I also started defining the snow shadows and lay of the land at this phase, again saving the pure whites for the middle area of the canvas.
Photo #5 - More snow highlights and some grasses poking through were added. I used the Browns on the Fan brush for the grass stubble, then added more definition ( especially nearer the foreground ) using a Script Liner. As an adjustment, I brightened the glint of light in the water using more Titanium White, which I felt gave it some extra oomph. Lastly, I used some of my Blues and White on the Script Liner to create the snow-covered rocks in the stream.
There you have it! Although there are many different ways to execute a painting, this is an approach I use quite often. By using the Acrylic underneath, I find that I can use less paint over-all in the Oil stage, which keeps me from getting bogged down on a slippery, thick canvas.
I choose my underpainting colors according to my subject. For example, I might use a Yellow or a Red for a sunset scene. Give it a try!


Friday, December 11, 2009

3 - Day Oil Painting Workshop, September 2010


I will once again be teaching a seminar at the Landgrove Inn, Landgrove, VT. It will run from September 10th to the 12th.


Last year's get-together was a fantastic time and we are looking forward to returning.


If great accomodations, unbelievable meals and hanging out with like-minded, artistic folks sounds good to you, you surely won't want to miss out on this!!


Visit http://www.landgroveinn.com/ or call 1(800)669-8466 for more info or to book your reservation.


IF YOU REGISTER BEFORE MARCH 31st, YOU WILL RECEIVE A 10% DISCOUNT ON THE TOTAL PRICE!! That's only $540 for the 3-night package, which is even slightly less than LAST year's price! That includes lodging, all meals and the workshops!!


A few spaces have already been filled, so don't delay and miss your chance!


Friday, Sept. 10th Project: "JANUARY MORNING" "This Winter sunrise is created solely with painting knives, which yields a very "impressionistic" result. The warm Reds of the barns played against the cool Blues & Purples of the snow shadows makes for a dramatic contrast. A great lesson in texture and color temperatures!"

Saturday, September 11th Project: "BASS HARBOR LIGHT, MAINE" "This is a rather detailed painting which features the Bass Harbor Light in Maine. The lighthouse stands bravely against an approaching storm. This will be a great lesson in blending techniques and fine detail!" Batten down the hatches!

Sunday, September 12th Project: "ADIRONDACK SUNSET" "The Adirondack region is a beautiful location to witness some spectacular sunsets. In this painting, Wilson will show you some great techniques for rendering believable, dramatic skies. It's easy when using a wet basecoat and large brushes! "

Friday, December 4, 2009

Updated Photo


As I mentioned in yesterday's post, I was intending to take a better photo of the roses under more favorable lighting conditions. I did a retake earlier this afternoon and I feel this one does the painting more "justice". At least, much more clarity and a truer reprsentation of the actual work. ( I also added a leaf on the table, but that was the only change. )
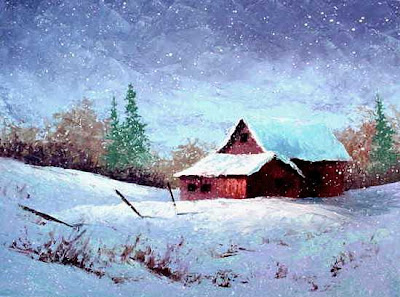
I just did the barn scene this morning. ( "WINTER MOOD" ) I felt like creating something, but didn't want to get into a piece that was too involved. I had a couple of hours to kill and wanted to paint just for fun! This one is on a 1-1/2 thick Gallery Wrap canvas ( 9" x 12" ). With the exception of some Fan Brush spatter to suggest the falling snow, it was rendered entirely with painting knives.
I swear the more I use those knives, the more I like them. It's all just a matter of what you're used to and comfortable with and I'm getting quite confident with them now.
Actually, I'm considering using this one as the theme for our Christmas cards, but I'd better get moving on it. Only 3 weeks left !!

Thursday, December 3, 2009

Vase of Roses

Every once in a while, I get the urge to paint a floral. Roses, Irises, Daisies, whatever,........ it's all good! I love painting still life anyway, so florals tie into that.
This was painted "wet -into- wet" ( on a black Acrylic-primed canvas ) with some glazing and touch-ups when it was dry.
Please excuse the rather dark, grainy image. I took the photo outdoors, but it was getting late in the afternoon and it was very overcast, as well, so this was the result. Maybe, I'll try another snap and re-post a better photo in a few days.